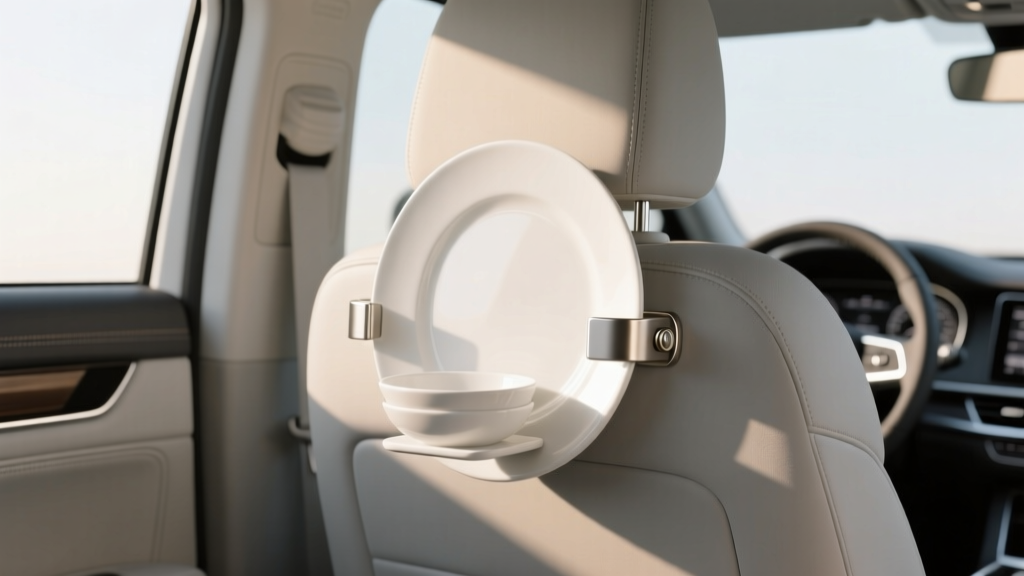
Plate and Bowl Holder Installation (2026)
Meals on the road used to mean one hand on the wheel and the other trying to balance a takeout container on your lap. That?s messy, distracting, and a fast track to stained seats and sticky cupholders. A properly installed plate and bowl holder changes the whole experience?whether you?re feeding kids in the second row, eating between job sites, or building a more practical overlanding setup.
This guide walks you through choosing the right style, mounting it safely, and getting a clean, factory-like result. You?ll also learn what to avoid (because the wrong install can turn into rattles, broken trim clips, or worse?an unsafe projectile in a hard stop). If you care about a tidy car interior and smarter cabin organization, this is a simple upgrade with big payback.
What Is a Plate and Bowl Holder for a Car?
A car plate and bowl holder is a small accessory designed to stabilize food containers?usually plates, bowls, and sometimes bento-style trays?while you?re parked or camping. The best ones are sized for common dish diameters, include a lip or clamp to prevent sliding, and mount to a stable area such as a seat-back, center console side, headrest posts, or a cargo platform.
Popular holder styles (and where they work best)
- Headrest-mounted tray holders: Great for families and rear-seat meals. Usually clamp to headrest posts.
- Seat-back fold-down trays: Often attaches to the seat-back via straps; some have a recessed ring for bowls.
- Center console side mounts: Good for front-seat use while parked; can be adhesive, clamp-on, or screw-mounted.
- Cupholder-adapter bowl rings: Inserts into an existing cupholder to stabilize smaller bowls. Quick and simple, but limited size range.
- Cargo-area meal platforms: Overlanding-friendly; usually bolted to a drawer system or cargo panel.
Before You Buy: How to Choose the Right Plate/Bowl Holder
?Universal fit? is a common label, but real-world cabins aren?t universal. Spend five minutes checking compatibility and you?ll avoid returns, rattles, and awkward positioning.
Key selection factors
- Mounting location: Front seat, rear seat, third row, or cargo area? Your best option depends on where you actually eat.
- Dish size range: Measure your common bowl/plate diameter. Many holders fit 6?8 inch bowls and struggle with wider plates.
- Weight capacity: A bowl of soup can be heavier than you think. Look for a stated capacity (2?5 lb is common).
- Adjustability: Tilt and height adjustments help keep food level on uneven ground (camping, sloped driveways).
- Materials: ABS plastic is common; reinforced nylon feels sturdier; aluminum is most rigid but can transmit vibration.
- Cleaning: A removable tray insert or wipe-clean surface matters. Food mess is inevitable.
Real-world example
If you drive a midsize SUV and regularly eat with kids in the second row, a headrest-mounted tray with a bowl ring and a raised lip is usually the most stable and easiest to clean. If you?re building a weekend camping rig, a cargo-area platform with a recessed bowl cutout is far better than a wobbly seat-back tray.
Tools and Supplies You?ll Want on Hand
Many holders install with no tools, but having a small kit ready makes any install smoother and helps prevent damage to interior trim.
- Measuring tape or ruler
- Isopropyl alcohol (70% or higher) and microfiber cloth (for adhesive mounts)
- Trim removal tool (plastic pry tool)
- Small socket set or screwdriver set (Phillips/Torx, depending on vehicle)
- Painters tape (for marking alignment)
- Zip ties or adhesive cable clips (for managing straps or loose ends)
- Optional: rubber anti-slip pads or thin foam tape (to reduce rattles)
Installation Safety Checklist (Don?t Skip This)
Food accessories seem harmless?until a sudden stop turns them into a projectile or they interfere with airbags.
- Airbag zones: Avoid mounting anything on or near side-curtain airbags, seat-mounted airbags, or dashboard airbag panels.
- Driver distraction: Plate and bowl holders are best used while parked. Don?t position a holder where it blocks shifter movement, climate controls, or visibility.
- Secure mounting: If it wiggles when tugged, it?s not installed correctly. Reposition or reinforce.
- Hot liquids: For soup or coffee, prioritize a deeper bowl ring and a level mounting surface.
Step-by-Step Installation: Headrest-Mounted Plate and Bowl Holder
This is the most common style for rear-seat dining and road trip setups. Most clamp onto the two metal headrest posts.
Step 1: Measure headrest post spacing
- Raise the headrest slightly so the posts are exposed.
- Measure the distance between posts (center-to-center).
- Confirm your holder supports that spacing (common ranges are 4.5?6.5 inches).
Step 2: Choose the best seat and height
- Sit in the rear seat (or have your passenger sit) and identify a comfortable tray height.
- Aim for a position where a bowl sits level and doesn?t contact knees during entry/exit.
- Use painters tape to mark a reference point on the seat-back if helpful.
Step 3: Install the clamp or bracket
- Open the clamp mechanism (or loosen the thumb screws).
- Slide the clamp onto the headrest posts evenly.
- Tighten by hand until snug. If the design includes a tool-tightened fastener, stop when it?s secure?over-tightening can crack plastic.
Step 4: Attach the tray and level it
- Click or slide the tray into the bracket according to the product?s design.
- Adjust tilt until a plate sits flat. Test with an empty bowl first.
- Confirm the tray doesn?t wobble when you press down on the front edge.
Step 5: Add anti-slip and rattle control (optional but worth it)
- Apply a thin rubber pad where the bracket contacts the posts if you hear squeaks.
- If the tray has a removable insert, line it with a washable silicone mat for grip.
Quick test
Place a filled water bottle in the bowl ring and gently push the tray side-to-side. If the tray shifts more than a few millimeters, tighten or reposition the mount.
Step-by-Step Installation: Adhesive or Console-Mounted Holder
Console and side-panel mounts can be excellent for front-seat use while parked?especially for commuters who eat lunch in the car. Adhesive-mounted units can work well if installed correctly.
Step 1: Pick a flat, stable surface
- Choose a surface that doesn?t flex when pressed.
- Avoid textured soft-touch rubber that adhesives struggle to bond to.
- Make sure the holder won?t interfere with seat movement or console lids.
Step 2: Clean like you mean it
- Wipe the area with isopropyl alcohol and a microfiber cloth.
- Let it fully dry (a minute or two).
- Avoid applying adhesive in very cold temperatures; most tapes bond best around 60?80�F.
Step 3: Test fit and mark alignment
- Hold the mount in place and open/close nearby doors, console lids, and glovebox.
- Mark the corners with painters tape so you can place it perfectly the first time.
Step 4: Apply and press
- Remove the adhesive backing without touching the sticky surface.
- Place the mount inside your tape marks.
- Press firmly for 30?60 seconds, applying even pressure across the entire base.
- Wait the recommended curing time (often 12?24 hours) before loading weight.
Step 5: Load test
Start with a light empty plate. Then test a full bowl over a towel. If the mount shifts, remove it and switch to a clamp-on or screw-in style (especially on textured panels).
Product Recommendations: What to Look For (and Who It?s For)
Rather than pushing one ?best? option, match the holder to your use case. Here are practical categories that work well for most vehicles.
Best for families: headrest tray with bowl recess
- Look for a raised outer lip and a deeper bowl ring.
- Choose a design with quick-release so you can remove it when not needed.
- Bonus features: napkin clip, utensil slot, spill channels.
Best for commuters: compact console-mounted holder
- Prioritize low-profile mounts so you don?t bump it entering/exiting.
- Choose washable inserts or smooth surfaces.
- Avoid oversized trays that block controls or your armrest.
Best for overlanding/camping: rigid platform or MOLLE-compatible tray
- Look for mechanical fastening (bolts/screws) to a drawer system or panel.
- Choose a leveling option or adjustable feet for uneven ground.
- Consider integrated storage for a cutting board or spice kit.
Common Mistakes to Avoid
- Mounting in an airbag deployment path: Side-curtain and seat airbags need a clear zone.
- Skipping surface prep for adhesive mounts: Oils and interior dressings ruin adhesion.
- Over-tightening plastic clamps: This causes cracking and squeaks later.
- Installing too low: Knees hit the tray, kids kick it, and you?ll remove it out of frustration.
- Ignoring tilt: A slightly nose-down tray guarantees spills, especially with bowls.
- Using it while driving: Even a stable holder can encourage distracted eating. Use it parked.
- Not accounting for seat movement: Sliding or reclining a seat can pinch straps or smash a tray.
Practical Tips for a Cleaner, More Durable Setup
- Use a silicone liner: It keeps plates from sliding and makes cleanup fast.
- Keep a microfiber and wipes nearby: Store them in a door pocket for quick spill control.
- Choose lidded bowls for kids: Even a good bowl ring won?t stop a full spill if the car rocks.
- Rattle prevention: Thin foam tape at contact points can make budget holders feel premium.
- Seasonal check: Heat/cold cycles loosen fasteners and weaken tape over time. Re-tighten monthly.
FAQ: Plate and Bowl Holders in Cars
Can I install a plate and bowl holder in the front seat?
Yes, but it?s best for use while parked. A console-side mount or a cupholder-adapter bowl ring is usually the most practical up front. Keep it clear of shifters, steering movement, and airbag areas.
Are adhesive-mounted holders strong enough for hot soup?
Some are, but only with proper surface prep and curing time. For heavier loads or textured panels, a clamp-on or mechanically fastened mount is more reliable?especially if you?ll use it often.
Will a headrest-mounted tray damage my seat?
If installed correctly, it shouldn?t. The risk comes from over-tightening clamps, using hard plastic directly against metal posts (causing squeaks), or letting kids yank on the tray. Adding a thin rubber pad can help prevent noise and scuffs.
What size bowls and plates fit most car holders?
Many holders are designed around 6?8 inch bowls and small plates. If you regularly use 10?11 inch dinner plates, look for a wider tray style with a raised lip rather than a small bowl ring.
How do I keep food from sliding on the tray?
A silicone mat or non-slip liner works extremely well. Also make sure the tray is level; even a slight tilt can cause sliding during normal cabin movement.
Can I remove the holder easily when I?m not using it?
Headrest-mounted and strap-mounted designs are usually quick to remove. Adhesive mounts are more permanent; removal can leave residue and may require adhesive remover safe for automotive interiors.
Wrap-Up: Your Next Steps
Pick your mounting location first (rear headrest, console side, or cargo platform), then choose a holder built for that spot and for the dish sizes you actually use. Install it with a focus on stability, level positioning, and safe placement away from airbags and moving parts. Once it?s mounted, do a quick load test and add anti-slip lining for a cleaner, quieter setup.
If you?re upgrading your cabin for road trips, family hauling, or camping, keep going?there?s a lot you can do with smart car interior accessories and organization. Explore more how-to guides and interior setup ideas on carinteriormix.com.